
| Tag | Lecture |
|---|---|
| Tags | nomadcoders |
| When | |
| 목적 | |
| 진행 상황 | In progress |
| Category | Project |
Trivial
vscode extensions
prettier설정- prettier 정상 작동이 안되면
cmd + ,에서 default formatter 검색하여 prettier 로 default formatter 설정해주기
- styled components 를 망가뜨린다면
- eslint 와 Prettier 의 충돌 의심
Name: Prettier ESLint Id: rvest.vs-code-prettier-eslint Description: A Visual Studio Extension to format JavaScript and Typescript code using prettier-eslint package Version: 3.1.0 Publisher: Rebecca Vest VS Marketplace Link: https://marketplace.visualstudio.com/items?itemName=rvest.vs-code-prettier-eslint
설치해보기
- eslint 와 Prettier 의 충돌 의심
- prettier 정상 작동이 안되면
VSCode에서 ESLint와 Prettier (+ TypeScript) 사용하기안녕하세요. VSCode 환경에서 ESLint, Prettier, 그리고 TypeScript를 사용하기 위해 개발 환경을 설정하던 중 글로 정리를 해두면 다른 분들(+ 미래의 나)에게 도움이 될 것 같아 글을 올립니다. 이해를 돕기 위해 이 글에서는 아주 간단한 Express 앱을 바탕으로 설정 과정을 진행할 예정입니다. 최종 설정 파일 내용을 바로 보고 싶으신 분들은 5.https://velog.io/@das01063/VSCode%EC%97%90%EC%84%9C-ESLint%EC%99%80-Prettier-TypeScript-%EC%82%AC%EC%9A%A9%ED%95%98%EA%B8%B0
 VSCode 설정 페이지를 여는 2가지 방법 - LYNMPVSCode 에서는 에디터를 설정할 수 있는 방법이 2가지가 있다. 하나는 설정 페이지를 열어 GUI 화면에서 키보드와 마우스 클릭으로 설정하는 방법이고 또하나의 방법은 JSON 형식으로 되어 있는 설정파일을 열어 직접 수정하는 방법이다.설정화면에서 설정하기내용을 GUI 화면에서 설정하기macOS : ⌘ + ,Windows : Ctrl + ,Linux : Ctrl + ,위의 키를 동시에 누르면 설정화면이 나타나고 원하는 항목을 검색하여 설정할 수 있다.JSON설정파일로 설정하기설정 내용을 직접 편집하여 설정할 수 있다.
 https://lynmp.com/en/article/ms811c9dc50j
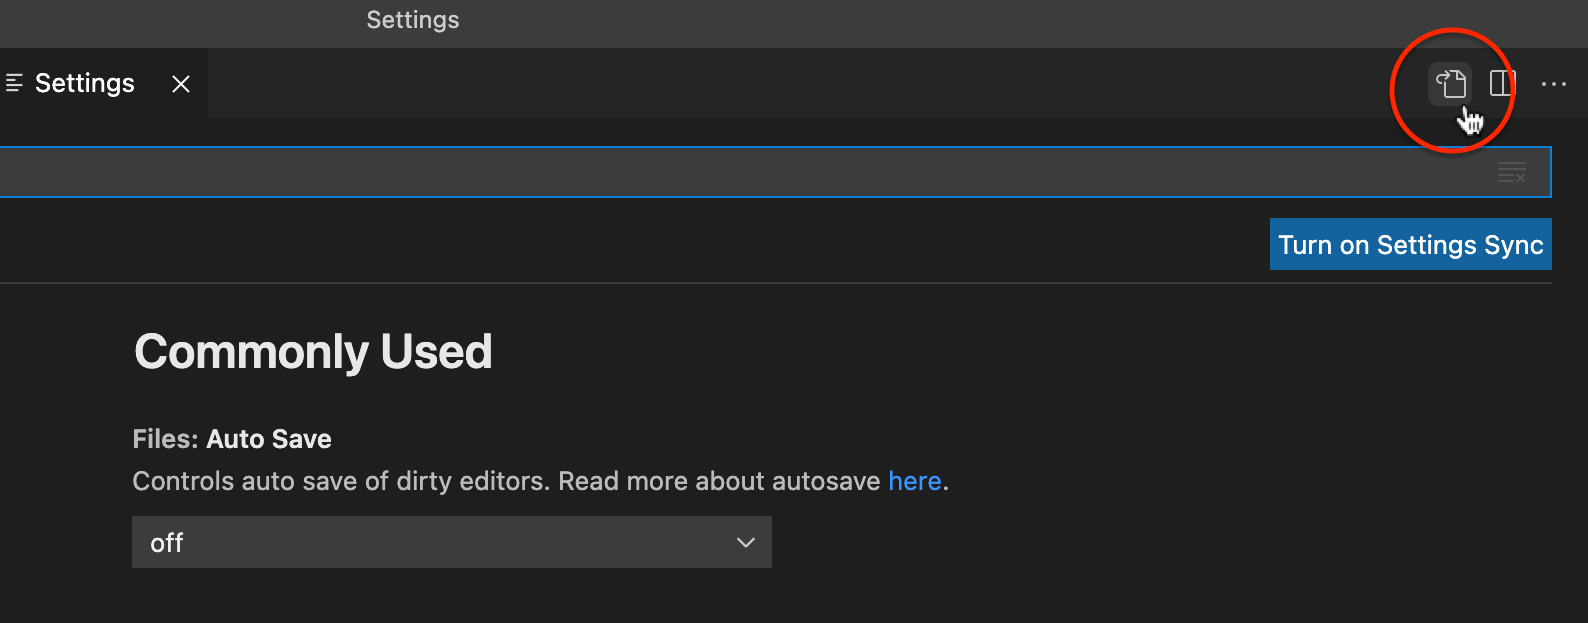 VSCODE Extension개발자는 게을러지기 위해 부지런해지는 법..제가 사용해보며 업무에 도움이 되는 몇 가지 유용한 vscode Extension을 공유 해볼까 합니다. 한글패치.. 그냥 한글패치... "editor.codeActionsOnSave": { "source.fixAll": true, "source.fixAll.eslint": true} 프로젝트에서 EsLint를 사용한다면 .eslintrc 에 설정된 룰에 따라 소스코드를 분석해서 문법 에러, 버그 등을 찾아서 보고해 줍니다.( 아래 코드를 vscode setting에 추가 해두면 저장 시에 자동으로 설정된 룰에 맞추어 소스코드가 변경되어 저장됩니다!!https://medium.com/@supersexy/vscode-extension-d00a8d2a0409
Errors
ESLint no-unused-vars
ESLint 설치 부터 하자.
npm i -g eslint로 eslint를 설치하고
eslint --init명령어를 실행한 후,
아래와 같이 몇가지 설정 조건에 대해 선택하면
.eslintrc.json파일을 자동으로 생성해준다.
.eslintrc.json의 “rules” 에 우리가 룰을 정해보자."rules": { "no-unused-vars": 0, "no-unused-expressions": 0, "react/react-in-jsx-scope": 0 } - 읽는 그대로 적용된다. 0은 해당 경고를 끄는 것이다.
2021년도 버전의 react-router-dom 이 최신 코드와 다른점이 있다.

Invalid hook calls
Invalid hook call. Hooks can only be called inside the body of a function component | bobbyhadzThe error "Invalid hook call. Hooks can only be called inside the body of a function component" occurs for multiple reasons, having a mismatch between the versions of `react` and `react-dom`. Having multiple versions of the `react` package in the same project. https://bobbyhadz.com/blog/react-invalid-hook-call-hooks-can-only-be-called-inside-body
- 결국 원인은 알 수 없었다.
recoil사용 중에 생긴 일이라recoil을 삭제했다가 설치했더니 괜찮아졌다.- 그 전에 node_modules 와 package-lock 을 삭제했다가 다시 모두 설치햇었다.
- 위의 문서에 따르면 react version 이 충돌한 듯 하다.

 https://ywtechit.tistory.com/174
To Remember
Styled Component
styled-component 에 prop 넘기기 (typescript)
Hooks & States
useStatestate 가 링크를 클릭할 때 생기므로, state 를 넘겨주는 방식에 따라서, 홈을 거치지 않고 링크에 바로 접속하면 state 가 없을 수 있다.
useEffect와useState로 해결해보자.
useEffect- 코드를 한 번만 실행하고 싶다면 마지막의 array 에 no dependencies
[]를 사용해야 한다.
- dependencies array 에 변수를 추가하거나 한다면, useEffect 가 다시 실행된다.
- 코드를 한 번만 실행하고 싶다면 마지막의 array 에 no dependencies
⭐️
react-queryreact-query에서 자동으로 refetch 시키기 (리얼타임)const { isLoading: tickersLoading, data: tickersData } = useQuery<PriceInterface>( ['price', coinId], () => fetchCoinTickers(coinId), { refetchInterval: 1000, } );
Typescript 와
react-query( type 설정에 관해 )useQuery(coinId, () => fetchCoinInfo(coinId));라는 부분이 있었다.coinId는type IParams = { coinId: string; }; const { coinId } = useParams() as IParams; 인데, type 은 되고,
interface로는 왜 안되는지 알 수 없었다.
react-router-dom v6 로 바뀌면서 생기는 문제들 / 바뀐 것들 doc
react-router-dom v6 로 바뀌면서 생기는 문제들 / 바뀐 것들 docLinkcomponent 의 state 전달 방식 변경
v6 의 전달 방식 사용해보기
<Link to={경로} state={state}>이렇게 넣어주어도 된다. 중요한 점은, 우리가 typescript 를 사용중이기 때문에,
Link되어 자식 컴포넌트에서 미리 타입을 지정해두어야 한다는 점이다. 나는 coin.name 을 넘겨줄 것이었으므로, 미리 interface 를 지정하여 둔다.
v6 의
navigate사용해서도 가능하다

Outlet
netlify 로 간단히 배포하자 (build.command failed 해결법)
netlify 로 간단히 배포하자 (build.command failed 해결법)- github 에 내 코드들을 다 push 한다.
- netlify 에서 github 연동
- 내 repo 지정해서 build
- 빌드 안될 때 체크 리스트
1. Build command
처음 웹을 디플로이 할 때, netlify 에서 앱을 빌드하기 위한 Build command를 적는 칸이 있다.
이 칸에 리액트 기준 평소에 적었던 'npm run build' 만 적으면 오류가 날 수 있다.
맨 왼쪽에 CI= 를 붙이자.

- netlify 에서도 이렇게 바꾸어주고
- 내 로컬 파일의
package.json에서도
"scripts": { "start": "react-scripts start", "build": "CI= react-scripts build", "test": "react-scripts test", "eject": "react-scripts eject" }, 이렇게 바꾸어주자.
Recoil 없이 / 활용한 state management
Recoil 없이 / 활용한 state management쌩으로 라이트모드 - 다크모드 만들어보기
index.tsx에서<App />을 감싸고 있던themeProvider를App.tsx로 옮기기App안에서 state 를 사용하기 위해서였다.
- 2 개의 theme 만들기
- dark 였다가 light 였다가 하도록 반대되는 set 함수 설정
- setState 할 때 함수로 할 수도 있다는 걸 기억하자
const [isDark, setIsDark] = useState(true); const toggleDark = () => setIsDark((currentState) => !currentState);
- 모드 스위치를 각 페이지의 header 에 두자. title 옆에 두던지
- 그렇게 되면,
Coins.tsx나Coin.tsxChart.tsx에서 처음에 설정했던 state 에 접근할 수 있어야 한다. 어떻게 할까? 많은 과정이 필요하다.App.tsx에서Router.tsx로toggleDark함수를 보낸다.- 함수를 보낼 때, interface 를 생성해야 함.
- 함수 생성 interface 구조에 대해서 알자.
- 함수를 보낼 때, interface 를 생성해야 함.
Router에서 또 다시Coins로 보내야 한다.- 또다시 interface 를 생성해야함.
- 이런 짜증나는 과정을 줄여주고 싶다.. 만약
isDark변수를 보내주고 싶으면 또 다시 이 무의미한 짓을 반복해야 한다.
- 이래서, Global state management 가 대두된다.
Recoil 사용해서 라이트모드 - 다크모드 만들어보기
Recoil 사용해서 라이트모드 - 다크모드 만들어보기- global state 가 필요할 때, 사용한다. 위에서 본 것처럼 비효율적인 코드를 줄이기 위함.
- 어느 component 에서도 접근 할 수 있도록 저장해두는 것이다.
Recoil에서는 이런 저장소를atom이라고 한다.
Quick start / e.g.
npm i recoil
QueryClientProvider처럼, index 에서 App 을 감싸주자. App 의 모든 곳에서 접근 할 수 있도록RecoilRoot라는 것을 감아준다.
atoms.ts를 만들어서
import { atom } from 'recoil'; export const isDarkAtom = atom({ key: 'isDark', default: false, }); 이렇게만 써주면, 끝이다.
- 여기서 만든
isDarkAtom을 쓰려면 다른 컴포넌트에서useRecoilValue만 import 해서 사용하면 된다.
How to modify atom’s value? 우리가 썼던 state 랑은 다를텐데..
useSetRecoilState만 import 해주면 된다.
const currentMode = useRecoilValue(isDarkAtom); const modeSetterFn = useSetRecoilState(isDarkAtom); - 이렇게 하면, 기존의 state 와 똑같이 작동한다.
<ModeBtn onClick={() => modeSetterFn((prevMode) => !prevMode)}>- 실제 btn 에서는 이렇게 onClick 이벤트를 활용해서 간단하게 쓸 수 있다.
자잘한, 도움 되는 것들
react 에서 전역 스타일 초기화 하기
모든 문서에 reset 을 적용하려면 어디에다가 해야할까?
createGlobalStyle을 사용했다! 전역 스코프에 스타일들을 올려준다.
하지만, App 에서는 하나의 컴포넌트만 return 해야 하는데, Router 와 GlobalStyle 두 개다 반환하려면?
- 여기서
Fragment가 나온다.
return ( <> <GlobalStyle /> <Router /> </> ); - 여기,
GlobalStyle에 reset css 를 넣어주고, font 나 다른 것들을 넣어주면 된다.
color 조합 가져오기 및 적용하기
flatuicolors.com 에서 조합을 골라서,
theme.ts의theme에 컬러 조합을 설정해주자.- theme 에 대해서 다시 생각해보자.
ThemeProvider는 전체App을 감싸고 있다. 위에서 설정한GlobalStyle은 어디에 있었지? 바로App내부에 있었다. 그러므로, 우리가theme.ts에서 설정한컬러들을 바로 사용할 수 있게 된다.
- 차트 구현
import { FaHome, FaCoins, FaChartLine } from 'react-icons/fa';- 엄청나게 간편하게 react 에서 icon 사용이 가능하다.
Create React.js app
npm을 설치하자.brew install npm
- react app 을 설치하자.
npm install -g create-react-app
- react app 을 만들자.
create-react-app [생성할 파일 이름]
- react app 을 실행시켜보자.
npm start- ?react app 을 생성한 곳에서 해야함
Styled Components
Intro
💡왜 styled components 가 react 에서 최고인가. 많은 기업들이 활용하고 있다. 이해하기 편리하고, 한 번 이해하면 매우 편리하다. 자동으로 클래스명 생성해서 collision 방지- 원래는, styles.css 를 적용하거나, 바로 tag 에 적용해주거나, module 을 사용해서 스타일을 작성했다. 이것들 중은 style module 을 사용하는 것이 가장 좋다.
- 하지만, 이것들보다 나은 것이,
styled component이다.
- 하지만, 이것들보다 나은 것이,
- 원래는, styles.css 를 적용하거나, 바로 tag 에 적용해주거나, module 을 사용해서 스타일을 작성했다. 이것들 중은 style module 을 사용하는 것이 가장 좋다.
Start & 컴포넌트의 확장
설치
npm i styled-components
간단한 예시
styled.[적용할 html 태그]`[적용할 css 코드]`;
styled 적용 전
import styled from "styled-components" function App() { return ( <div style={{ display: "flex" }}> <div style={{ backgroundColor: "teal", width: 100, height: 100 }}></div> <div style={{ backgroundColor: "tomato", width: 100, height: 100 }}></div> </div> ) } export default App;
적용 후
import styled from "styled-components" const Father = styled.div` display: flex; `; const BoxOne = styled.div` background-color: "teal"; width: 100; height: 100; `; const BoxTwo = styled.div` background-color: "tomato"; width: 100; height: 100; `; const Text = styled.span` color : white `; function App() { return ( <Father> <BoxOne /> <Text>Hello</Text> <BoxTwo /> </Father> ) } export default App;
- style 부분과 html 파트를 구분하여 가독성이 매우 좋아진 코드를 얻을 수 있다.
- 중복 작성된 부분을 어떻게 해결할 것인가?
컴포넌트의 확장 / 설정 변경
props! 컴포넌트의 속성을, 태그를 생성할 당시에 정할 수 있게 한다.
- 컴포넌트를 생성할 때 기존의 컴포넌트를 상속받고 싶다면?
const Circle = styled(Box)` border-radius: 50px; `; styled(상속 받을 기존의 component)
전체 코드
import styled from "styled-components" const Father = styled.div` display: flex; `; const Box = styled.div` background-color: ${(props) => props.bgColor}; width: 100px; height: 100px; display: flex; align-items: center; justify-content: center; `; const Circle = styled(Box)` border-radius: 50px; `; const Text = styled.span` color:white; `; function App() { return ( <Father> <Box bgColor="teal"> <Text> 안녕 </Text> </Box> <Circle bgColor="red" /> </Father> ) } export default App;
다수의 컴포넌트를 다룰 때 도움이 될 트릭
컴포넌트의 태그를 바꾸고 싶은데 스타일은 바꾸고 싶지 않다면
const Btn = styled.button` color:white; background-color: tomato; border:0; border-radius: 30px; `; - 이러한 버튼이 있는데, 이것의
button이 아니라a나 다른 태그가 필요한데,Btn의 style 은 가져가고 싶다면 어떨까props를 사용해주자.
<Btn>Log in</Btn> <Btn as="a" href-="/">log out</Btn> 첫 번째와 두 번째의 차이를 보자.
as=“a” 라는 prop 으로 기존의 태그를 바꿀 수 있다. 다른 모든 html 태그로 바꿀 수 있는 겅시다.
- 이러한 버튼이 있는데, 이것의
컴포넌트의 속성을 styled coponent 를 정의할 때 정할 수 있다.
const Father = styled.div` display: flex; `; const Input = styled.input.attrs({ required: true })` background-color: tomato; `; function App() { return ( <Father> <Input></Input> <Input></Input> <Input></Input> <Input></Input> <Input></Input> </Father> ) } attrs안에 원하는 속성을 정의하였다.
애니메이션 기초 / pseudo selector
우리를 도와줄
keyframes를 가져오자import {keyframes} from “styled-components"
keyframe 사용 예시
const rotationAni = keyframes` 0%{ transform:rotate(0deg); border-radius: 0px; } 50%{ transform:rotate(360deg); border-radius: 50px; } 100%{ transform:rotate(0deg); border-radius: 0px; } `; const Box = styled.div` height: 200px; width: 200px; background-color : tomato; animation:${rotationAni} 3s linear infinite; `; animation에, keyframes 로 미리 구현해둔 애니메이션을 넣을 수 있다.
hover, &, pseudo selector
const Box = styled.div` height: 200px; width: 200px; background-color : tomato; display: flex; justify-content: center; align-items: center; animation:${rotationAni} 3s linear infinite; span{ font-size:100px; &:hover{ font-size:40px; } &:active{ opacity: 0; } } `; pseudo selector 2
위의 코드를 보면, 만약
Box안에서 사용하던span을 다른 태그로 바꾸어주면 동작하지 않을 것이다. tag name 에 의존하고 있기 때문에.내 안의 컴포넌트를 직접 타겟할 수 있다. 그렇게 되면,
as를 통해 내가 선택한 영역을 어떤 html 태그로 바꾸든지 간에 동작할 것이다.import styled, { keyframes } from "styled-components" const Wrapper = styled.div` display : flex; `; const rotationAni = keyframes` 0%{ transform:rotate(0deg); border-radius: 0px; } 50%{ transform:rotate(360deg); border-radius: 50px; } 100%{ transform:rotate(0deg); border-radius: 0px; } `; const Emoji = styled.span` font-size:20px; `; const Box = styled.div` height: 200px; width: 200px; background-color : tomato; display: flex; justify-content: center; align-items: center; animation:${rotationAni} 3s linear infinite; ${Emoji}{ &:hover{ font-size:98px; } &:active{ opacity: 0; } } `; function App() { return ( <Wrapper> <Box> <Emoji as="p">😁</Emoji> </Box> </Wrapper> ) } export default App;
컴포넌트 안의 것들을 지정하여 바꾸기 / 다른 element target 하여 처리하기
import styled, { keyframes } from "styled-components" const Wrapper = styled.div` display : flex; `; const rotationAni = keyframes` 0%{ transform:rotate(0deg); border-radius: 0px; } 50%{ transform:rotate(360deg); border-radius: 50px; } 100%{ transform:rotate(0deg); border-radius: 0px; } `; const Box = styled.div` height: 200px; width: 200px; background-color : tomato; display: flex; justify-content: center; align-items: center; animation:${rotationAni} 3s linear infinite; span{ font-size:100px } `; function App() { return ( <Wrapper> <Box> <span>😁</span> </Box> </Wrapper> ) } export default App; 이모티콘은 컴포넌트 안에 있지 않다. 어떻게 바꾸지?
Box 안에서 span 을 직접 선택할 수 있다.
다크모드-라이트모드 를 위한
Themestheme 은 파일의 모든 색상을 가지고 있는 object 이다.
theme 초기 세팅
index.js의<App />을ThemeProvider로 감싸준다.import { ThemeProvider } from 'styled-components'로 먼저 import 해주고
- theme 변수 두 가지를 생성한다.
const darkTheme = { textColor: 'whitesmoke', bgColor: '#111', } const lightTheme = { textColor: '#111whitesmoke', bgColor: 'whitesmoke', } ThemeProvider theme={설정할 theme 변수}로 theme 을 지정한다.- 구조를 생각해보자.
ThemeProviderApp- 우리가 구성할 Component 들
- 이 이렇게 있기 때문에, 결국 모든 Component 가 theme 의 색상에 접근할 수 있게 된다.
- 구조를 생각해보자.
- 두 개 이상의 theme 이 같은 property 들을 가져야지, 나중에 dark mode - light mode 간의 전환이 쉽다.
App.js로 돌아와서, props 를 활용해 theme 의 데이터들을 끌어다 쓴다.const Box = styled.div` height: 200px; width: 200px; background-color: ${(props) => props.theme.bgColor}; display: flex; justify-content: center; align-items: center; `
그렇다면, theme 을 바꾸는 것만으로 전체적인 색상을 변경할 수 있다. 처음 구현할 때부터 이를 염두해 두고 색상 설정을 하자.
TypeScript
TypeScript 란?
💡JS 를 기반으로Strongly-typed한 언어이다. JS 와는 다르지만, 거의 같다. 새로운 기능만 추가한 정도이며, 문법도 같다.- JS 는 데이터 타입을 전혀 신경 쓰지 않는다. 강점이 될 수도 있지만, 단점이 많다. 안전장치가 없어 return 값을 보장할 수 가 없다.
const user = { firstName : "kim", lastName : "MK" } console.log(user.name) >> undefined 을 하더라도, JS 는 전혀 막지 않는다. 유저와 개발자 간의 의사소통이 불가능해지는 부분이 생긴다.
- 그래서, TS 가 등장한다. 프로그램이 작동하기 전에 데이터 타입을 체크해주는 것이다!
TS 의 경우

const plus = (a:number, b:number) => a + b;위와 같이, 데이터 타입을 명시해주어야만 오류 없이 작동이 된다. 이는 마치 파이썬의 그것과 비슷하다. 하지만, 실제로 검증을 해준다는 점에서 다르다.
- 하지만, 브라우저가 이해할 수 있는 언어는 오직 JS 뿐이다. 브라우저는 TS 를 알아듣지 못한다.
- 그래서, TS 가 컴파일 전에 데이터 타입을 검증하고, 그 후에 JS 로 스스로를 컴파일 해준다.

TypeScript 설치 / 설정
- 새로운 리액트 앱 (타입스크립트 기반) 만들기
npx create-react-app my-app --template typescript
- react + ts 에서는 .tsx 확장자를 사용한다.
TypeScript 는 props 와 styled-component 를 모른다.
하지만, js 로 쓰인 라이브러리를 ts 에 import 할때도 있다. 어떻게 해야할까?
styled-components의 경우npm i styled-components를 실행한 후에,
npm i --save-dev @types/styled-components
@types란 무엇일까?거대한 라이브러리. 사람들이 모여 라이브러리의 타입을 모두 적어둔 것이다. 유명한 npm 패키지들의 타입들을 적어둔 방대한 도서관이다. 우리가 쓰고 싶은 라이브러리가 있는데 type 이 없다면, 우리가 직접 참여할 수도 있다.
- 새로운 리액트 앱 (타입스크립트 기반) 만들기
TypeScript 에서의 데이터 타입 명시 :
interfacevsprop typesprop typesvsinterfaceprop types는 코드를 실행한 후에만 가능하다. 그래서, 오류를 미연에 보고받고 예방할 수 없다. 우리는 코드가 실행되기 전에 알아서, 보호하고 싶으므로, TS 의interface를 사용할 것이다.
- 이를 위해,
interface를 사용한다.interface는 일종의 데이터이다. prop 에 대한 데이터 타입 정보를 담고 있다. 이것을 TS 에 전달해주면 TS 의 데이터 타입 체크가 실행되어, 데이터 타입을 보장받을 수 있다.
- 결국, object 가 어떻게 보일 것인지에 대한 정보이다.

- 예시
interface PlayerShpae { name: string; age: number; } const sayHello = (playerObj: PlayerShpae) => `Hello ${playerObj.name}` you are ${playerObj.age} years old!`;
- 하지만, 현 상태로는 prop 이 항상 필요한 required 상태이다. 필요하지 않다면 어떻게 할까?
default props vs optional props
- 같은 syled coponent 가 여러 개 생성될 수 있다. 그럴 때, 만약 처음 것에는 border 을 주고 다음 것에는 border 을 주고 싶지 않다면 어떻게 해야 할까?
optional prop을 생성해보자!
interface CircleProps { bgColor: string; borderColor?: string; } - 단지 변수명 끝에
?을 추가해주기만 하면 된다.

- optional 은
?로 구현했다면, default 로 반환하는 것은 어떨까?- 값을 설정할 때, 삼항 연산자와 비슷하게,
??를 사용하여, 없으면 default 값이 반환되게 하는 것이다.
- 값을 설정할 때, 삼항 연산자와 비슷하게,
- 위의 코드를 살펴보자.
CircleProps에서는 borderColor 가 optional 하다.
ContainerProps에서는 borderColor 가 required 하다.App.tsx에서 두 개의 Circle 중 하나만 borderColor 를 가져도 문제를 일으키지 않는 것은 1번의 덕분이다.circle.tsx에서 22 라인에 문제가 생기지 않는 것은 우리가 default 값을 주었기 때문이다. 만약 default 값을 주지 않았더라면,ContainerProps의borderColor가 required 이기 때문에, 에러가 발생했을 것이다.
- 하지만, 이런 default 값이 귀찮다면, 이렇게 해도 된다. function 단에서 ES6 js 문법을 활용해 default 값을 주는 것이다.
function test({text="default text"} : testProps){ return ...; }
- 같은 syled coponent 가 여러 개 생성될 수 있다. 그럴 때, 만약 처음 것에는 border 을 주고 다음 것에는 border 을 주고 싶지 않다면 어떻게 해야 할까?


Typescript 와 react state
💡State? 페이지 전체의 새로고침 없이, 데이터를 갱신시켜, 웹을 앱처럼 사용할 수 있게끔 한다.const [ state 값, state 값 변경 함수 ] = useState([default])꼴로 사용한다. 값이 변경될 것 같은 data 들은, var 이나 let 같은, 변수가 아닌 state 에 저장하는 것이 용이하다.default값의 type 이 state 값과, state 함수 인자의 type 으로 자동 추측된다. 하지만, 언제나 그렇듯 커스터마이징 가능하다. 아래 코드에서는number와string두 개의 type 을 가질 수 있게 만든 것이다. state type 을 바꾸는 것은 많이 쓰이지는 않지만, 알아두자.const [value, setValue] = useState<number|string>(0);
Form 구현
💡이름을 받아서, “안녕, 이름" 을 출력하는 form 을 작성해보자.import React, { useState } from 'react'; function App() { const [value, setValue] = useState(''); const onChange = (event: React.FormEvent<HTMLInputElement>) => { const { currentTarget: { value }, } = event; setValue(value); }; const onSubmit = (event: React.FormEvent<HTMLFormElement>) => { event.preventDefault(); console.log('안녕', value); }; return ( <div> <form onSubmit={onSubmit}> <input value={value} onChange={onChange} type="text" placeholder="이름써" /> </form> </div> ); } export default App; 실행 결과

- input 의
onChange- input 의 값이 변경될 때마다 실행된다.
- 특이한 점은,
event: React.FormEvent<HTMLInputElement>이다.- 다른 것들은 js 의 코드와 똑같지만, 이것만큼은 다르다. (나머지 es6 문법은 검색해보아라)
- prop 으로 받는
event의 data type 을 명시해준 것이다.- 이런 것들은 외울 수도, 직관적으로 알 수도 없다. 검색, 경험만이 답이다!
- 실행 절차
- 값이 바뀐다.
onChange함수가 실행된다.- state 인
value값을,setValue함수를 통해 바꾸어준다.- 이때,
setValue에 들어가는value는 바뀌어진 input 의 실제 string 이다.
- 이때,
- state 인
- form 의
onSubmit- form 이 제출될 때 실행된다.
- 실행 절차
- 제출되어
onSubmit함수가 실행된다.onChange에서 이미 바뀐, value 값을 출력한다.
- 제출되어
💡중요한 점은, 데이터 타입 명시를 하여 모든 prop 이 protection 을 받을 수 있다는 점이다. js 보다 실수를 저지를 위험이 덜해진다. 이런 데이터 타입 명시가 귀찮다고 생각할 수 있겠지만, 전혀 아니다. 한 번 데이터 타입을 명시하면, TS 자체적으로 자동완성을 지원하기 때문에, 내장함수, 내장변수명을 틀린다든지 하는 실수도 줄이며, 타이핑 속도도 빨라지기 때문에 일석이조라고 볼 수 있다.

더 많은 라이브러리를 TS 로 & styled-component, Theme 과 TS 연결해보기
TS declaration
💡styled-component, 테마를 활용할 때는 실수할 여지가 많다. ts 에서의 환경 설정 참고 ts 에서styled-components를 사용할 경우 세팅은 했다. 그래서 우리는 우리 모르게index.d.ts라는 설정 파일을 설치 했을 것이다. 하지만, 더 많은 것들에 대해서 type 을 선언하고 싶다면? 확장하고 싶다면 어떨까- 처음에 우리는
ThemeProvider를 이용해서 theme 을 설정했다. 하지만, 그 때 우리가 theme 의 data type 에 대해서 명시했었던가? 아니다. 그래서, 이러한styled-components들 속 여러가지에 대해 type 을 선언해서, JS 가 아닌 TS 에서 쓸 수 있다.- src 폴더에
styled.d.ts파일 생성- 이 파일은 우리가
@types를 통해 제공받았던styled-components들의 타입을 오버라이딩 하여 정보들을 확장시킬 것이다.
import 'styled-components'; declare module 'styled-components' { export interface DefaultTheme { textColor: string; bgColor: string; } } 이로써, 우리가 전의 component 들에게 해줬던 것들처럼, 테마에 대한 interface 를 생성시킨 것이다.
- 이 파일은 우리가
- src 폴더에
theme.ts파일에 실제 theme 을 작성해보자.import { DefaultTheme } from 'styled-components'; const lightTheme: DefaultTheme = { bgColor: 'white', textColor: 'black', }; const darkTheme: DefaultTheme = { bgColor: 'black', textColor: 'white', }; - 각 theme 에 대한 type 을 방금 작성했던
DefaultTheme으로 고정해둠으로써, 예기치 못한 오기, 입력 부재 등을 방지할 수 있으며, 당연히 자동완성을 활용하여 더 빠른 코딩이 가능하게 되었다.
import { DefaultTheme } from 'styled-components';- 우리의
styled.d.ts파일이 자동으로styled-components라이브러리 상에 오버라이딩 되었기 때문에, 우리는DefaultTheme을 파일 그 자체에서 import 하는 것이 아니라 라이브러리 상에서 import 한다.
- 우리의
- 각 theme 에 대한 type 을 방금 작성했던
darkTheme을 사용해보자!import React, { useState } from 'react'; import styled from 'styled-components'; const Container = styled.div` width: 200px; height: 200px; background-color: ${(props) => props.theme.bgColor}; color: ${(props) => props.theme.textColor}; `; const H1 = styled.h1` background-color: ${(props) => props.theme.bgColor}; color: ${(props) => props.theme.textColor}; `; function App() { const [value, setValue] = useState(''); const onChange = (event: React.FormEvent<HTMLInputElement>) => { const { currentTarget: { value }, } = event; setValue(value); }; const onSubmit = (event: React.FormEvent<HTMLFormElement>) => { event.preventDefault(); console.log('안녕', value); }; return ( <div> <Container> <form onSubmit={onSubmit}> <input value={value} onChange={onChange} type="text" placeholder="이름써" /> </form> </Container> </div> ); } export default App; - 이 코드는 App.tsx 로, index.tsx 안의
ThemeProvider안의App으로 export 되어있다.

- 그러므로, App.tsx 안의 모든 것들은 prop 안에 있는
theme에 접근할 수 있게 된다.
Container와H1을 보자.props.theme을 사용하여,- theme.ts 파일을 수정하는 것만으로 모든 색을 조정할 수 있게 됐다.
- 라이트모드 - 다크모드를 자유롭게 오갈 수 있게 됐다.
- TS 의 type 검증으로 인해 이로 인한 에러 가능성을 배제시켰다.
- 자동완성 기능으로 더 나은 코딩을 할 수 있게 됐다.🤣🙂
- 이 코드는 App.tsx 로, index.tsx 안의
- 처음에 우리는

۞ Recap
- TS 는 타입 체크만 추가된 JS 의 확장판이다.
interface를 활용하여 props 의 데이터 타입을 지정해 줄 수 있다.- optional, default props 설정 가능
onClick같은 이벤트에도 타입을 지정해주어야 한다.React.FormEvent<HTMLButtonElement>같은 것들이 있었다. 이러한 패키지들을 찾는 것은, 항상 같은 방식인 것은 아니다. 각 상황에 맞추어서 doc 을 읽어보자.SyntheticEvent에서 react 의 모든 이벤트들을 찾아볼 수 있다.
npm install --save-dev @types/패키지명를 사용해서, 사람들이 미리 정리해둔 데이터 타입들을 TS 에 전달하여, JS 라이브러리를 TS 에서 구동시킬 수도 있다.
⭐️CRYPTO TRACKER ⭐️
Setup
설치 (위의 typescript / styled-components 과정을 거쳤다는 걸 고려해주세요)
npm i react-router-dom react-query- 하지만, TS 는
react-router-dom의 타입을 모르기에, 에러를 발생시킬 거다.@types를 해보면, 다행히, 존재한다.
npm i --save-dev @types/react-router-dom
- 하지만, TS 는
구조 및 progress
- react-ts-master ( 작업 폴더 )
- node_modules... 외
src
routes
Coin.tsx
useParams로 parameter 받아오기import { useParams } from 'react-router-dom'; interface RouterParams { coinId: string; } const Coin = () => { const { coinId } = useParams() as RouterParams; return <h1>{coinId}</h1>; }; - TS 이기 때문에, parameter 받아오는 것도 형식을 지정해주어야 한다.
- 그러기 위해,
interface를 설정하였다.
useLocation으로 받아온 state 처리하기여기서도, 주의해야 할점은 우리가 ts 를 사용한다는 것이다. Link 의 state 로 받아오는 것들을 미리 타입을 지정해 두어야 한다.
v6 에서는 제네릭을 지원하지 않기 때문에,
const { state } = useLocation() as RouteState;넘어온 state 처리를 이런 식으로 해주면 된다.
useEffect로 coin data 받아오기 및 state 에 넣기(react query 사용 전)💡api 의 type 에 대한 정보를 자동 생성 할 수 있지만, 이번엔 일일히 다해보자. 하지만 나는 사이트를 이용했다..async await fetch 3가지를 이용해서 데이터를 받고, 각 state 를 만들어서 넣어준다.
const { coinId } = useParams(); const { state } = useLocation() as RouteState; const [loading, setLoading] = useState(true); const [info, setInfo] = useState<InfoInterface>(); const [priceInfo, setPriceInfo] = useState<PriceInterface>(); useEffect(() => { (async () => { const infoData = await ( await fetch(`https://api.coinpaprika.com/v1/coins/${coinId}`) ).json(); const priceData = await ( await fetch(`https://api.coinpaprika.com/v1/ticker/${coinId}`) ).json(); setInfo(infoData); setPriceInfo(priceData); setLoading(false); })(); }, []); - state 가 링크를 클릭할 때 생기므로, state 를 넘겨주는 방식에 따라서, 홈을 거치지 않고 링크에 바로 접속하면 state 가 없을 수 있다.
useEffect와useState로 해결해보자.<Title> {state?.name ? state.name : loading ? 'Loading....' : info?.name} </Title> - state 가 생성되었다면 (홈페이지를 따라서 들어왔다면) 그냥 이름을 출력해준다.
- state 가 없다면
loading을 보는데, loading 중이라면 대기 구문을 출력해주고,
setLoading(false)를 통해 load 끝난 것을 알았다면, 받아온 data 에서 name 을 출력해준다.
Overview 만들기 (css things..)

Nested Router (docs)
💡가격 보여주는 곳, 차트 보여주는 곳 을 여기 페이지(/:id) 에 만들건데, 그것들이 각각의 url 을 가지길 원한다. 새로고침 없이, url 만으로 서브 페이지를 만드는 것이다.- 새로운 route 들을 만든다. price.tsx, chart.tsx
Router.tsx에서, /:coinId 에 대한 자식 Route 로 추가한다.
<Route path="/:coinId" element={<Coin />}> <Route path="price" element={<Price />} /> <Route path="chart" element={<Chart />} /> </Route> Coin.tsx에서 돌아와서 자식 route 들을 어디에 표현할 것인지를Outlet으로 나타낸다.
return ( <Container> <Header> <Title> {state?.name ? state.name : loading ? 'Loading....' : info?.name} </Title> </Header> {loading ? <Loader>로딩중...</Loader> : <a></a>} <Outlet/> </Container> ); - react fragment 를 사용해야 할 수 도 있다.
현재 url 이 어딘지 파악해서 chart 입장하면 버튼 색 바꾸기
useMatch- 특정한 url 에 있는지에 대한 정보를 알려준다.
- 내가 만약 Chart 페이지에 있다는 것을 유저에게 어떻게 알려줄까?
- Chart 페이지에 들어가면 Chart 글자색이 바뀐다던지 해야한다.
const priceMatch = useMatch('/:coinId/price'); const chartMatch = useMatch('/:coinId/chart'); - 이 값들은 해당 경로에 있는지 없는지를 판별해준다.
<Tabs> <Tab isActive={chartMatch !== null}> <Link to={`/${coinId}/chart`}>Chart</Link> </Tab> <Tab isActive={priceMatch !== null}> <Link to={`/${coinId}/price`}>Price</Link> </Tab> </Tabs> - 여기서
isActive에, true or false 값을 props 로 보내서 현재 우리가 지정한 url 에 들어와 있나를 styled component 에 전달한다.
const Tab = styled.div<{ isActive: boolean }>` width: 120px; cursor: pointer; padding: 5px; margin: 10px; color: white; text-align: center; background-color: ${(props) => props.theme.overviewColor}; a { color: ${(props) => (props.isActive ? props.theme.bgColor : 'white')}; &:hover { color: ${(props) => props.theme.bgColor}; } transition: color 300ms ease-in-out; } `; - 이처럼, style 을 지정할 때, 위에서 보낸 prop 을 활용해 조건으로 지정하여 만들 수 있다.
react-query를 활용해서 chart component 만들기npm i react-query엄청나게 간결한 코드 작성이 가능해진다.
react-query도입 전Coins.tsxconst Coins = () => { const [coins, setCoins] = useState<CoinInterface[]>([]); const [loading, setLoading] = useState(true); useEffect(() => { (async () => { const response = await fetch('https://api.coinpaprika.com/v1/coins'); const json = await response.json(); setCoins(json.slice(0, 100)); setLoading(false); })(); }, []); return ( <Container> <Header> <Title>UPbit</Title> </Header> {loading ? ( <Loader>로딩중...</Loader> ) : ( <CoinsList> {coins.map((coin) => ( <CoinElement key={coin.id}> <CoinWrapper> <Link to={`/${coin.id}`} state={{ name: coin.name }}> <Img src={`https://cryptocurrencyliveprices.com/img/${coin.id}.png`} /> {coin.name} → </Link> </CoinWrapper> </CoinElement> ))} </CoinsList> )} </Container> ); };
quick start
ThemeProvider처럼 provider 를 만들어야한다.
const queryClient = new QueryClient(); root.render( <React.StrictMode> <QueryClientProvider client={queryClient}> <ThemeProvider theme={theme}> <App /> </ThemeProvider> </QueryClientProvider> </React.StrictMode> ); - 한 번 설정만 하면 끝!
Coins.tsx 를
react-query로 코드의 복잡성 줄이고, 장점들 :useQuery- fetcher function 을 만든다.
const [coins, setCoins] = useState<CoinInterface[]>([]); const [loading, setLoading] = useState(true); useEffect(() => { (async () => { const response = await fetch('https://api.coinpaprika.com/v1/coins'); const json = await response.json(); setCoins(json.slice(0, 100)); setLoading(false); })(); }, []); - 이것에 대한 fetcher 를 만들어 보자.
export async function fetchCoins() { return await (await fetch('https://api.coinpaprika.com/v1/coins')).json(); } fetchCoins를 api 파일에 만들고
useQuery를 사용해보자.
const { isLoading, data } = useQuery<ICoin[]>('getAllCoins', fetchCoins);장점들을 몇 가지 알 수 있다
isLoading가 data 에서 자동으로 생성되어서, 기존에 사용하던 loading, setLoading 같은 state 가 필요없어진다.
- 페이지를 왔다갔다 하더라도, 계속 loading 이 되지 않는다.
- 이것은,
react-query가 data 를 cache 에 갖고 있기 때문이다. 훨씬 더 빠른 속도를 체감할 수 있다.
- 이것은,
Coin.tsx 를
react-query로 코드의 복잡성 줄이고, 장점들 :useQueryreact-query의 devtool 을 사용해서 캐시에 있는 query 를 볼 수 있다.
ReactQueryDevtools라는 것이다.- argument 가 있는 query 함수 작성하기
- 위의 코드와 비슷하게 작성한다.
const { isLoading: infoLoading, data: infoData } = useQuery<InfoInterface>( ['info', coinId], () => fetchCoinInfo(coinId) ); const { isLoading: tickersLoading, data: tickersData } = useQuery<PriceInterface>(['price', coinId], () => fetchCoinTickers(coinId)); useQuery의 첫번째 인자는 unique 해야하므로, 위와 같이 작성했다.ReactQueryDevtools로 보면- 처음엔
getAllcoin밖에 없다.

- bitcoin 을 한 번 들어가면 bitcoin 의 price 와 info query 가 남는다.


home 으로 나가도 그대로다!
이로써, 한 번 들어갔다 나온 페이지에 대해서는
react-query가 cache 에 data 를 유지해주어서, loading 할 필요가 없어져서, 웹앱이 빨라진다.
data visualization / chart component 만들기
api 에서 차트 데이터 받기
Coin.tsx 에서 썼던 구조와 완벽하게 같다.
- 달라진 점은 api 주소 / api 가 요구하는 date 인자들
useOutletContext를 활용하여 coinId 를 넘겨주기- Coin → Chart 로 바로 coinId 를 넘겨주기 위함이다.
data visualization / chart
apexcharts를 써보자. 상상하는 모든 차트가 구현가능하다.quick start
설치 :
npm install --save react-apexcharts apexchartsimport ApexChart from ‘react-apexcharts'
- quick start 를 거친 다음, 위의 doc 에서
모든 것을 찾을 수 있다.
예시 코드
<ApexChart type="line" series={[ { name: coinId, data: data!.map((price) => price.close), }, ]} options={{ theme: { mode: 'dark', }, chart: { width: 300, height: 300, toolbar: { show: false, }, background: 'transparent', }, grid: { show: false, }, xaxis: { axisTicks: { show: false }, axisBorder: { show: false }, labels: { show: false, }, }, yaxis: { show: false, }, stroke: { curve: 'smooth', width: 3, }, }} />
더 예쁜 것들을 위해
fill: { type: 'gradient', gradient: { gradientToColors: ['blue'], stops: [0, 100] }, }, colors: ['red'], tooltip: { y: { formatter: (value) => `$ ${value.toFixed(4)}`, }, }, xaxis: { axisTicks: { show: false }, axisBorder: { show: false }, labels: { show: false, }, type: 'datetime', categories: data!.map((tmp) => tmp.time_close), },
차트와 Coin info 들을 real time 처럼 만들어보기
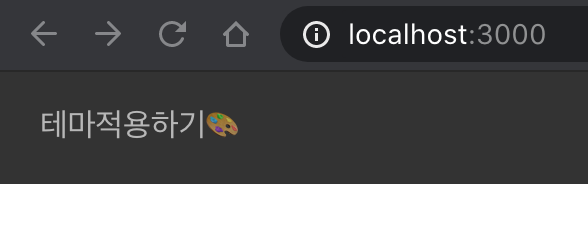
react-helmet으로 제목 아이콘을 바꾸어주자useNavigate활용해서 뒤로 가기 버튼 만들기Coins.tsx
전체적인 구조 구상
- Container
- Header
- Title
- CoinsList
- API 로 받아온 coin 들
- Header
paprika API 로 coin data fetch 해오기
useEffect/useState를 활용 ( react query 사용 전 )CoinInterface를 만들어서 API 로 받아올 coin 들에 대한 type 을 지정해준다.userState<CoinInterface[]>([]);
useEffect를 사용하면 컴포넌트 라이프 사이클 중에서, 어떤 때에 코드를 실행시킬 지 지정할 수 있다.함수를 정의하지 않고 바로 실행시키는 방법
( () => { 실행시킬 함수 내용... })();

개별 coin 으로 페이지 넘어갈 때
Link의state로 정보 넘기기<Link to={`/${coin.id}`} state={{ name: coin.name }}>v6 로 넘어오면서 넘겨주는 방식이 달라졌다.
Coins.tsx 를
react-query로 코드의 복잡성 줄이고, 장점들 :useQuery- fetcher function 을 만든다.
const [coins, setCoins] = useState<CoinInterface[]>([]); const [loading, setLoading] = useState(true); useEffect(() => { (async () => { const response = await fetch('https://api.coinpaprika.com/v1/coins'); const json = await response.json(); setCoins(json.slice(0, 100)); setLoading(false); })(); }, []); - 이것에 대한 fetcher 를 만들어 보자.
export async function fetchCoins() { return await (await fetch('https://api.coinpaprika.com/v1/coins')).json(); } fetchCoins를 api 파일에 만들고
useQuery를 사용해보자.
const { isLoading, data } = useQuery<ICoin[]>('getAllCoins', fetchCoins);장점들을 몇 가지 알 수 있다
isLoading가 data 에서 자동으로 생성되어서, 기존에 사용하던 loading, setLoading 같은 state 가 필요없어진다.
- 페이지를 왔다갔다 하더라도, 계속 loading 이 되지 않는다.
- 이것은,
react-query가 data 를 cache 에 갖고 있기 때문이다. 훨씬 더 빠른 속도를 체감할 수 있다.
- 이것은,
Chart.tsx
line chart 를 candle chart 로 바꾸어보자.
Price.tsx
Router.tsx
전체적인 웹 구조 설정
BrowserRouterSwitch: 하나의 route 씩 보게 해줌Coin
Coins
App.tsx
Router.tsx에서 전체Router받아오기
index.tsx
styled.d.ts
theme.ts
기본
theme설정import { DefaultTheme } from 'styled-components'; export const theme: DefaultTheme = { bgColor: 'white', textColor: 'black', };


